AirSim Georeferenced World - Part 2
This article is Part 2 in a two part series of creating a georeferenced world in the Unreal Engine that can be used in AirSim. Part 1 focuses on creating the world in Blender, while Part 2 will focus on importing the world into Unreal and working with AirSim in the Unreal Engine.
Recap
At this point you should have a FBX file and a PNG image of the terrain overlay that was created in Part 1. The FBX file will hold our meshes (with unwrapped UV), while the PNG image will be used to create a new material in Unreal Engine.
Set Up
First create a new Unreal Engine project and follow these steps for creating a custom unreal environment for AirSim. Some basic steps are as follows, but please follow the guide linked first:
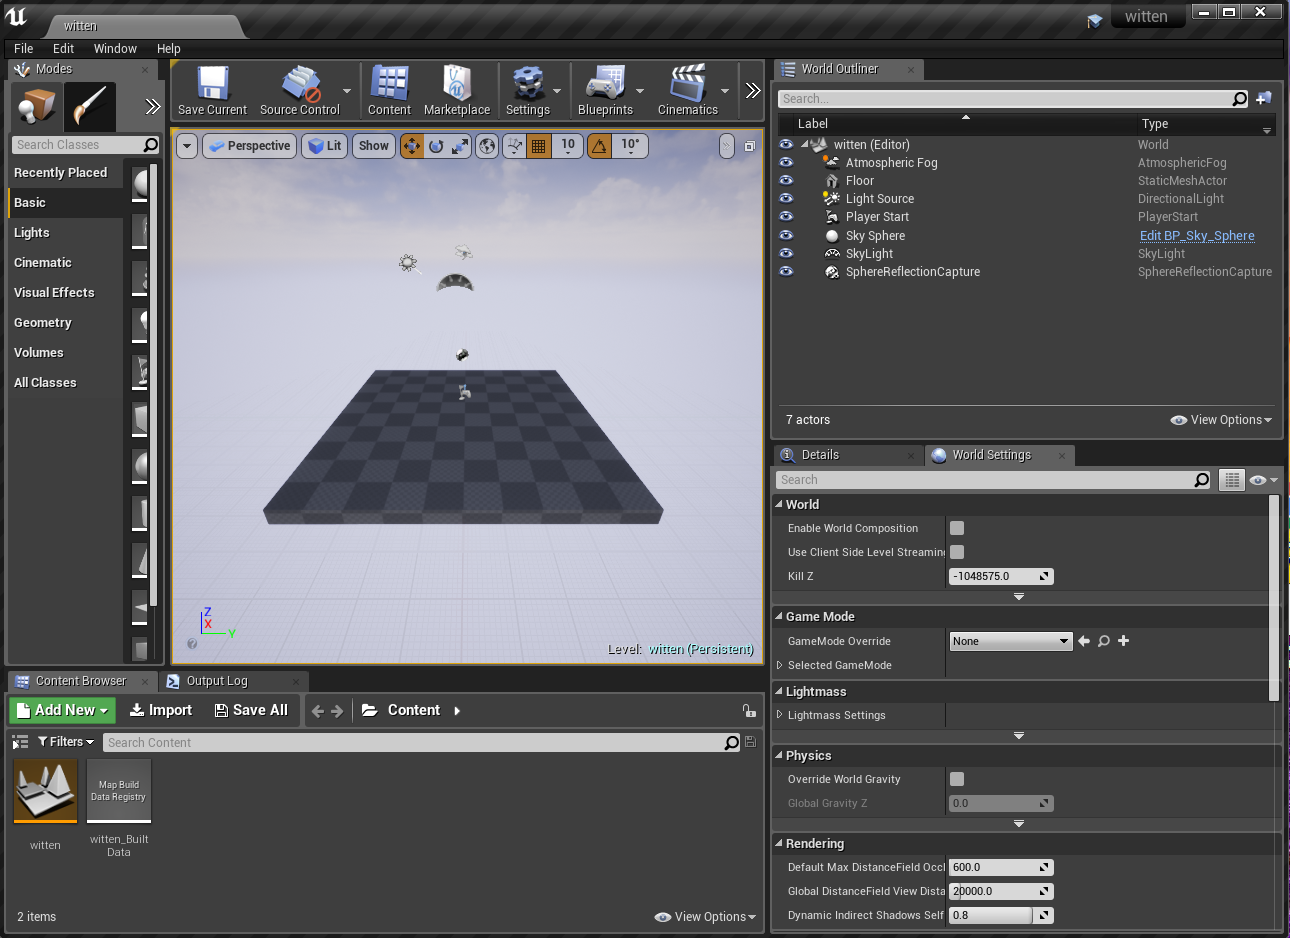
- Create a new unreal project. Save the level as “witten”
- Create a new dummy C++ class

- Close the Unreal Engine
- Open up your
.uprojectfile with a text editor. Modify as so (change your unreal version number to whatever you have).
{
  "FileVersion": 3,
  "EngineAssociation": "4.20",
  "Category": "",
  "Description": "Example Georefernced World",
  "TargetPlatforms": [
    "MacNoEditor",
    "WindowsNoEditor"
  ],
  "Plugins": [ {
      "Name": "AirSim",
      "Enabled": true
    }
  ]
}
- Drag and drop the AirSim Plugin into this project plugin folder
- Right Click the .uproject file and click “Generate Visual Studio Project Files”
- Open up Visual Studio and build the project. Build -> Build Solution
- Close Visual Studio
- Open up the Unreal Engine project
- Change game mode to
AirSimGameMode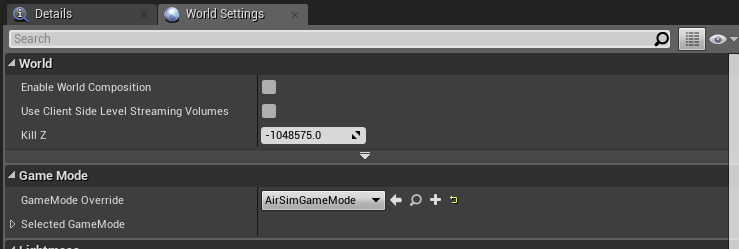
After this you should be good to go. Check to see if by pressing play the drone is spawned at PlayerStart and if you can control it. If it doesn’t work try to follow the steps again from the AirSim Custom Environment link above.
Import Assets
This section will outline how to import assets into Unreal.
- In the content browser, create a new folder called
import. We will import assets into here. - Click File -> Import into Level. Select the FBX file we exported from blender
- Keep all the defaults. Import all the meshes into one blueprint.
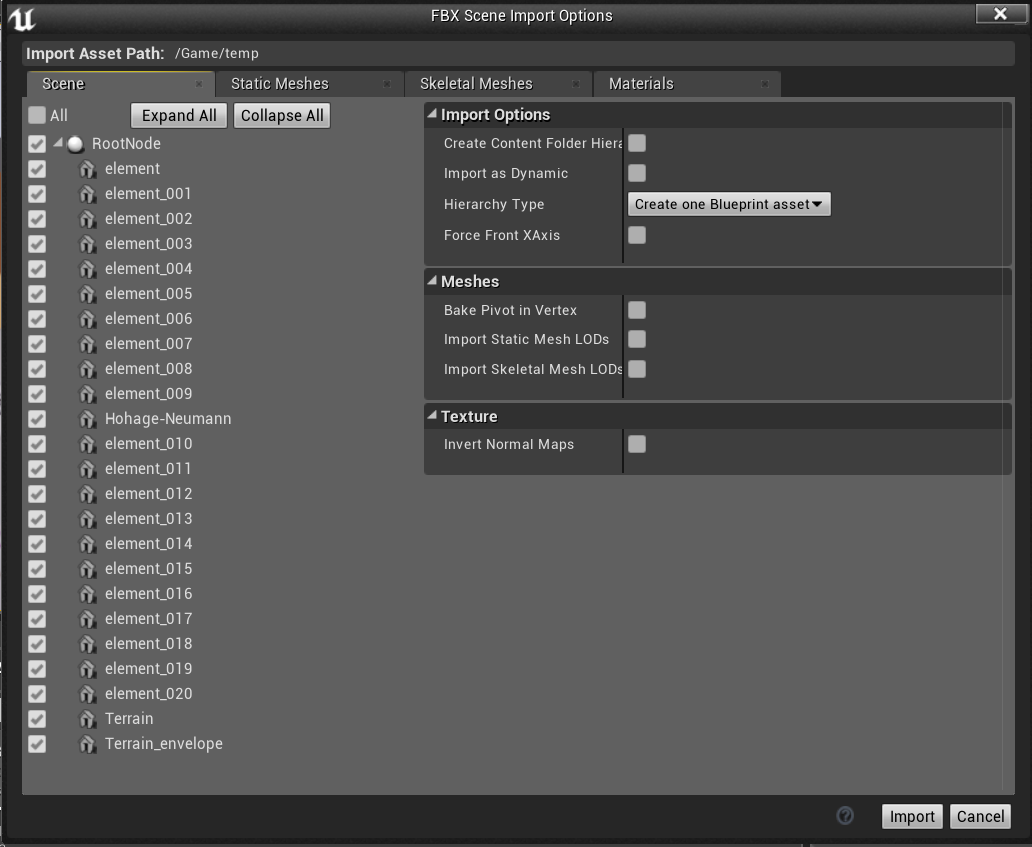
- Perform Import, may take some time.
- Position the imported object (city) at (0,0,0)
Import image overlay PNG
- Rename your image overlay PNG file to
overlay_image.PNG. - Drag and drop that image into the content browser
importfolder. This will create atexture.
Fix Terrain Overlay
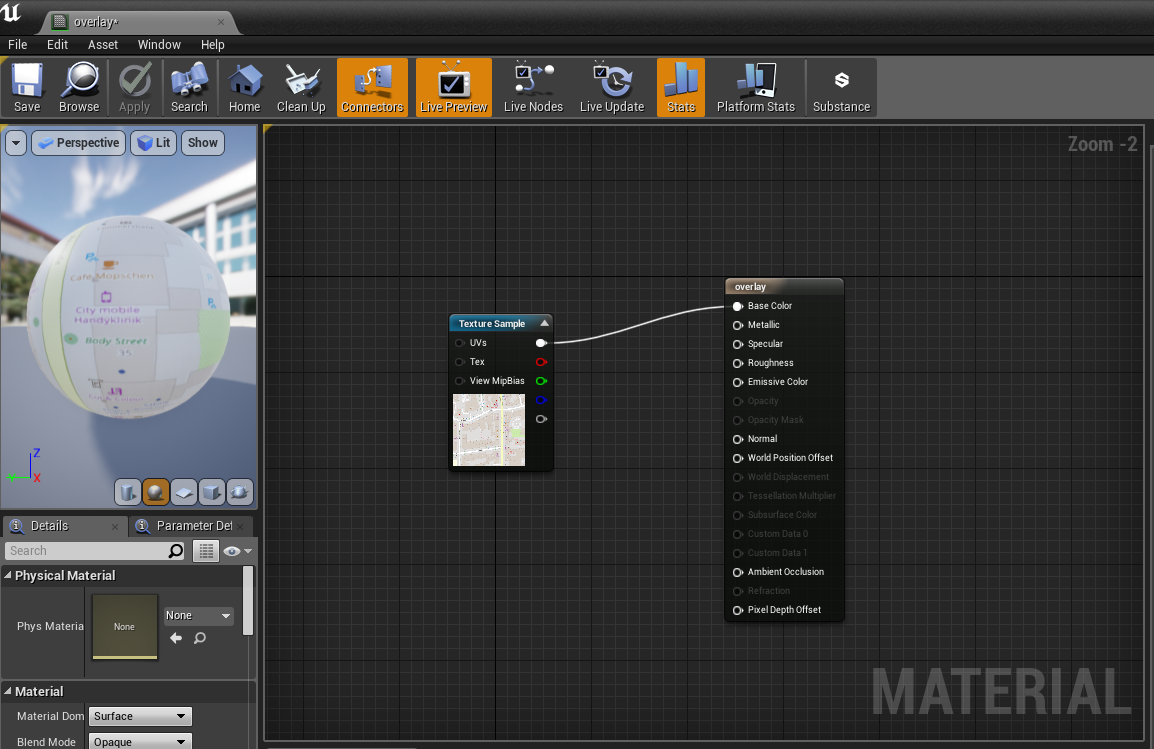
- Open up the
overlaymaterial. This material is not theoverlay_imagetexture you just created, but a material. This will spawn a new Material Editor window. - Drag
image_overlaytexture into Material Editor window. - Connect texture to overlay as shown below
Fix Collisions
The collision are not very good for the imported city mesh. The fastest and easiest way to fix is shown below. Note that this is not very efficient for collision checking, but I have not really had any significant issues on small portions of cities.
- Inside the
importfolder, filter by only meshes - Select all the meshes
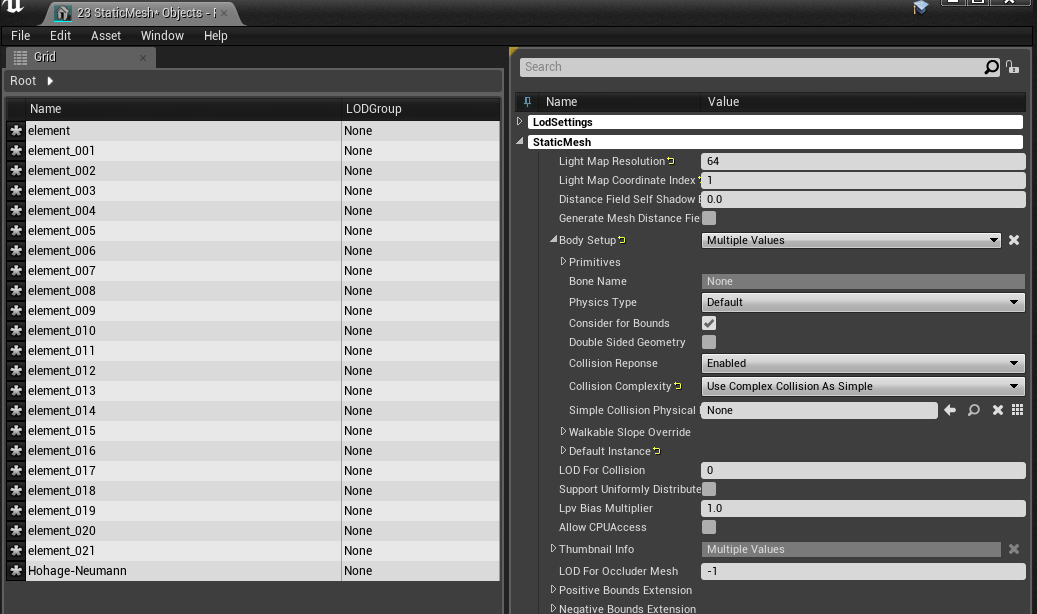
- Right click -> Asset Actions -> Bulk Edit via Property Matrix
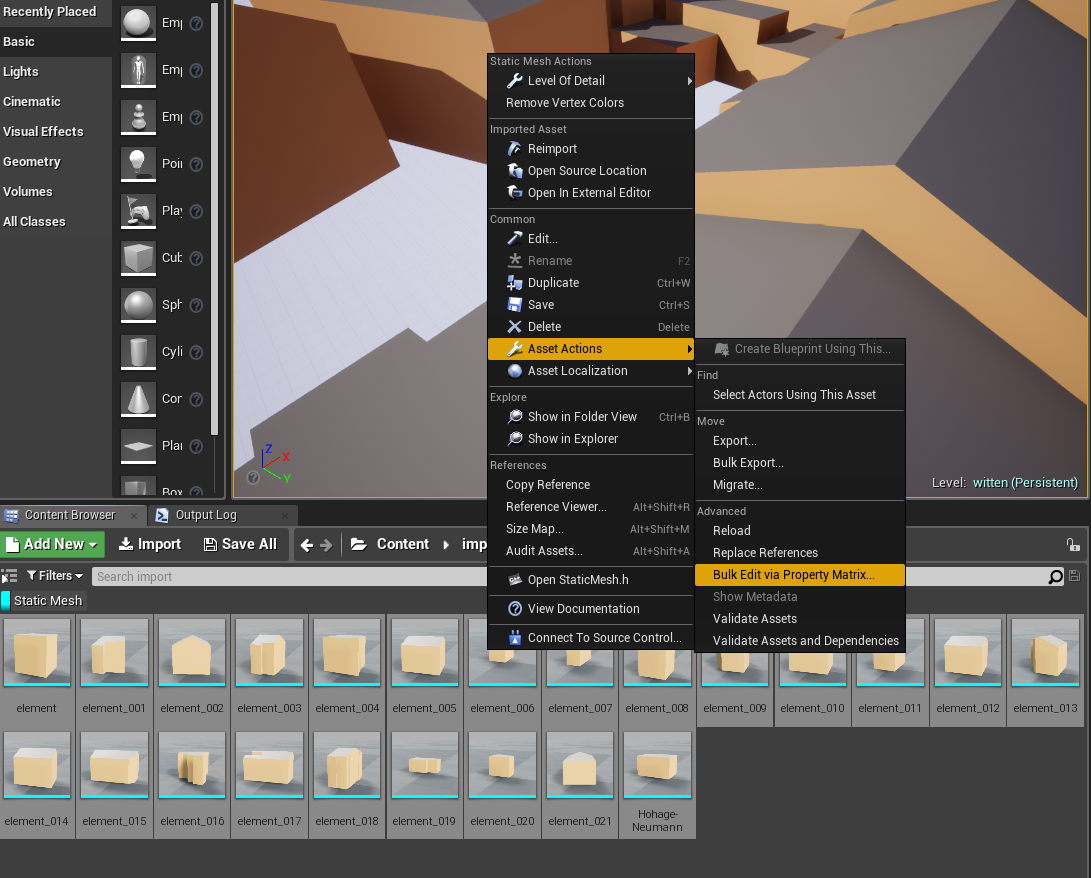
- Change Collision Complexity from “Default” to “Use Complex Collsion as Simple”
- File -> Save
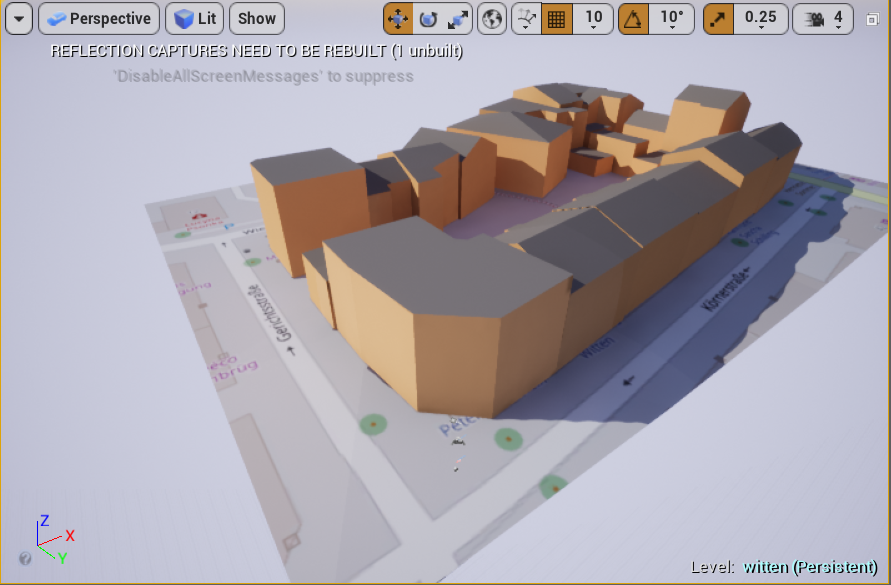
Verify
At the end you should something that looks like the image below. You should be able to fly around and hit buildings with good collisions.
AirSim Geo
The final step is to allow AirSim to understand the projected coordinate system used in Unreal. I created AirSimGeo in order to handle this. This module gives AirSim the ability to reason about arbitrary projection systems that your simulation environment may be in. AirSim works with NED by default, however this plugin allows you to work within any projected coordinate system that pyproj can handle.
AirSimGeo client extends AirSim’s “MultirotorClient”, so you have full access to all of AirSim’s method. The three additional methods this module provides are:
- getGpsLocation
- moveToPositionAsyncGeo
- moveOnPathAsyncGeo
Clone the AirSimGeo repo, install it, and run the example files. The fly.py file should reproduce the following image of flying in Witten, Germany.
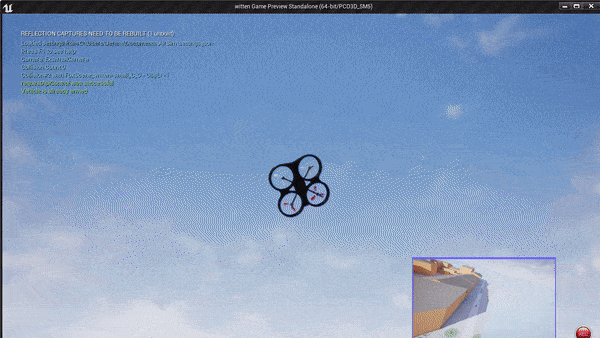
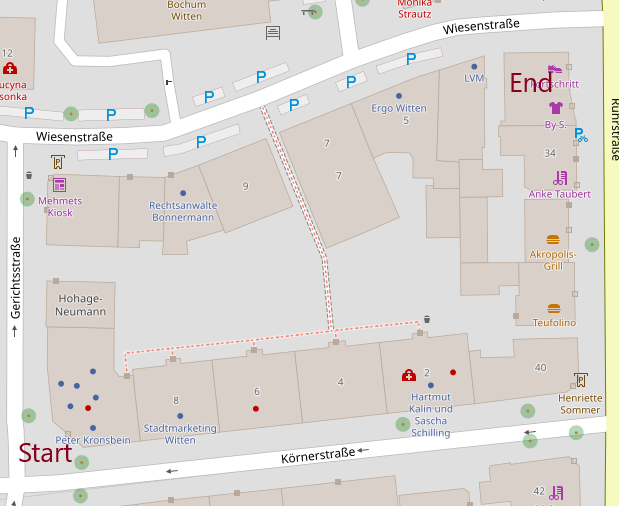
The commanded positions are actual positions in the world and the drone actually moves to these recreated positions in the Unreal World. The shape and area of the objects in this environment are very close to what they are in real life because we are using the local UTM projected coordinate system. The code for completeness:
"""
Flys to a georeferenced building in the Unreal Engine
"""
import time
from airsimgeo import AirSimGeoClient
SRID = 'EPSG:5555'
ORIGIN = (7.33577, 51.43672, 3.3)

def main():
    client = AirSimGeoClient(srid=SRID, origin=ORIGIN)
    client.confirmConnection()
    client.enableApiControl(True)
    client.armDisarm(True)
    # Take off
    client.takeoffAsync(timeout_sec=5).join()
    gps = client.getGpsLocation()
    # Go up by 15 meters
    gps_new = (gps[0], gps[1], gps[2] + 15.0)
    print("Going Higher")
    client.moveToPositionAsyncGeo(gps=gps_new, velocity=5).join()
    # Move to new position
    gps_new = (7.33709, 51.43735, 22.0)
    print("Moving")
    client.moveToPositionAsyncGeo(gps=gps_new, velocity=10,).join()
    # Land, doesn't seem to work....
    time.sleep(5)
    print("Landing")
    client.landAsync().join()


if __name__ == '__main__':
    main()